 |||
|||
When you have as many projects going on as I do, things get confusing pretty fast. Ok, maybe I have too many projects, but that’s another issue altogether. I like to break things up pretty granularly, so I end up with a metric crap-ton of projects. I tried many different ways to keep them easily searchable and sortable, and finally settled on creating projsect codes. I had a slightly different system before reading a post over on joebuhlig.com. I adopted a bunch of stuff he’s doing and it really streamlined and solidified my system.
The basic gist is - create a code that has 3 parts. The year, the Area of Responsibility (AoR), and an incremented number. So a code may be 23CC14 for the 14th project of 2023 in my Cocktails and Coffee AoR. It’s a great system that has a lot of benefits. Easier searching, better sorting, and being confident that things are named the same everywhere are just a few.
My problem was keeping track of that incremental number. Opening Omnifocus or Obsidian every time I wanted to create a project just so I could see what number I was on became a burden. So, me being me, I created an overcomplicated Shortcut to count for me!
This Shortcut relies on DataJar, an amazing Shortcuts utility by Simon Støvring. It’s basically just a database for Shortcuts where you can store things in data dictionaries. For the purposes of this Shortcut, I’ve created a database named ProjectCodes and in that, three dictionaries: aor, ProjectIncrement, and icons.
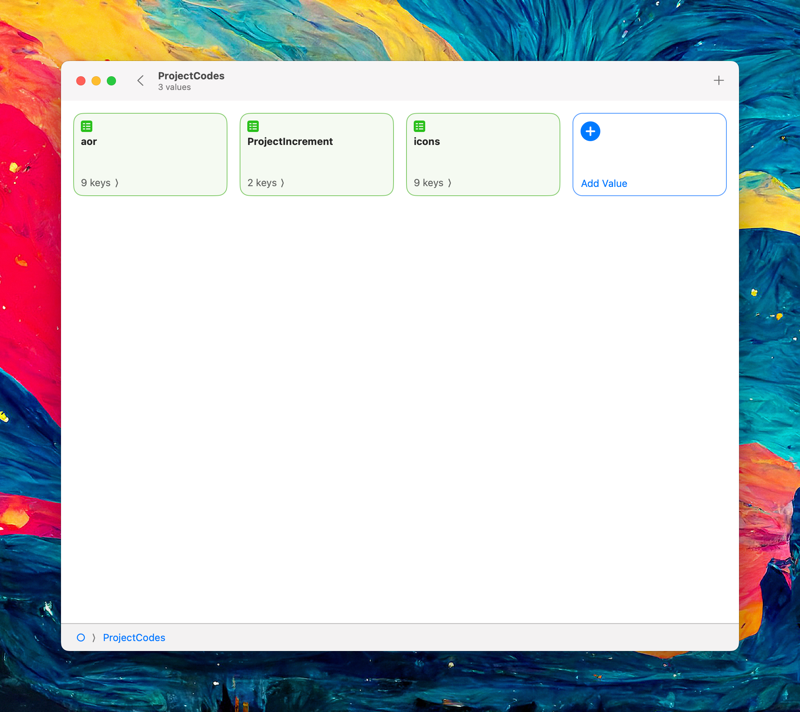 The Project Codes in DataJar
The AoR dictionary has a bunch of key:value pairs with the name of the project and the code. This makes it nice in Shortcuts when choosing from a menu, it displays the name and the code.
 The AoR Dictionary
The Project Increment dictionary has a bucket for each year. Inside the year is a number value for each project code key. This keeps the number of the most recent project increment for each AoR. The Shortcut automatically increments this every time I create a project.
 The Project Increment Dictionary
 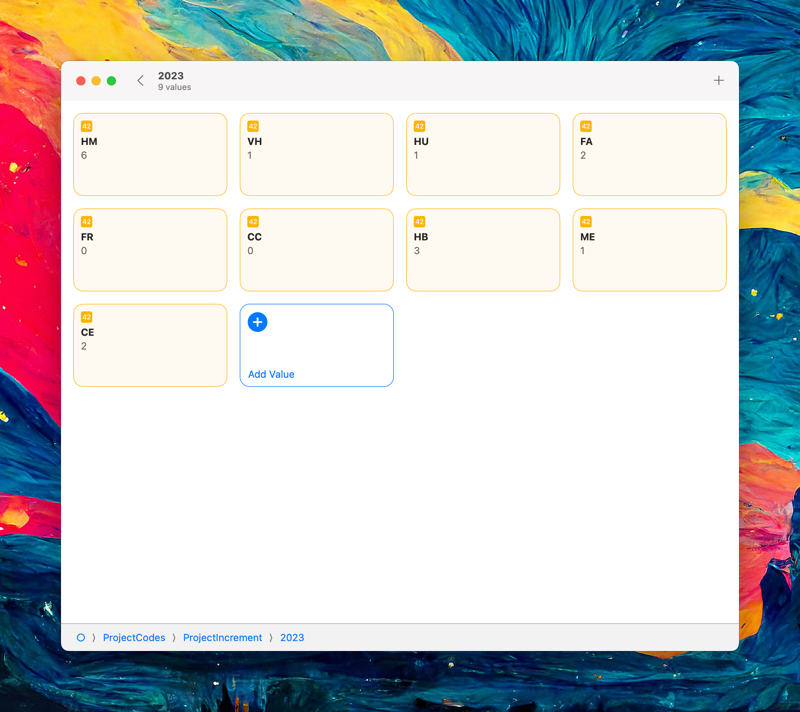 The 2023 Dictionary
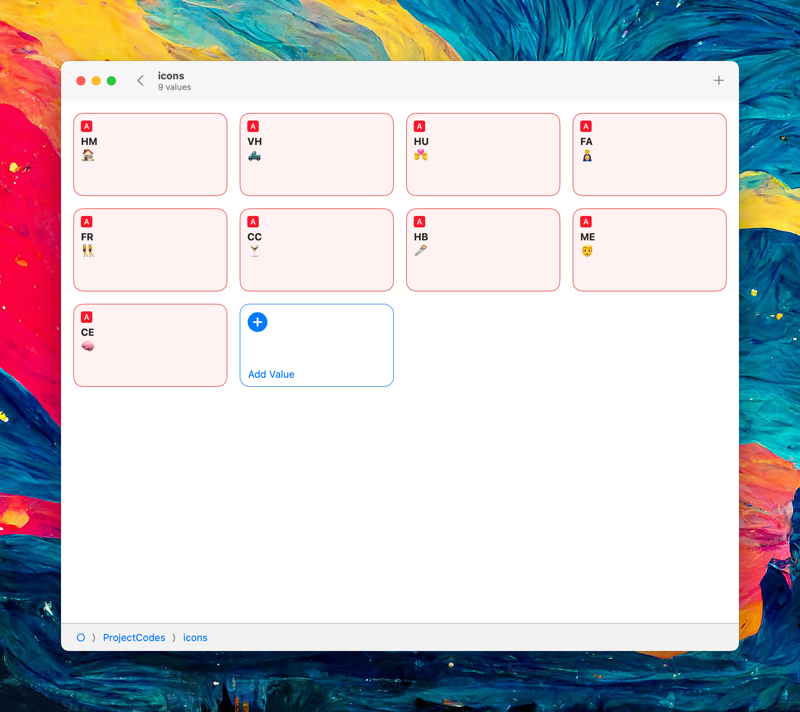
The Icon Dictionary is totally optional. I like using emoji in my project names as a sort of “icon”, so I keep those emoji here, as values against the project code key.
 I’m sure you could do this a thousand other ways using a spreadsheet or even a text file, but I like the way DataJar handles this, and the Shortcuts actions make getting data in and out of DataJar super simple using simple dot-syntax (like
 ProjectCodes.ProjectIncrement.2023.HM to get the increment for my Home AoR.)
Obviously, if you set up your DataJar differently, you’ll need to adjust all the actions in the downloaded Shortcut.
| Step | Image | Description |
|---|---|---|
| 1 |  Ask for Input Ask for Input |
Step 1: Ask for Text to get the project name. |
| 2 |  Get value for Get value for |
Step 2:•Get value for the DataJar collection named ProjectCodes.aor (which is where I keep my Area of Responsibility codes in key:value pairs in DataJar |
| 3 |  Cloose ffrom Lis Cloose ffrom Lis |
Step 3: Choose from the list of codes pulled in Step 2. |
| 4 |  Set variable Set variable |
Step 4: Set variable to the chosen item |
| 5 | 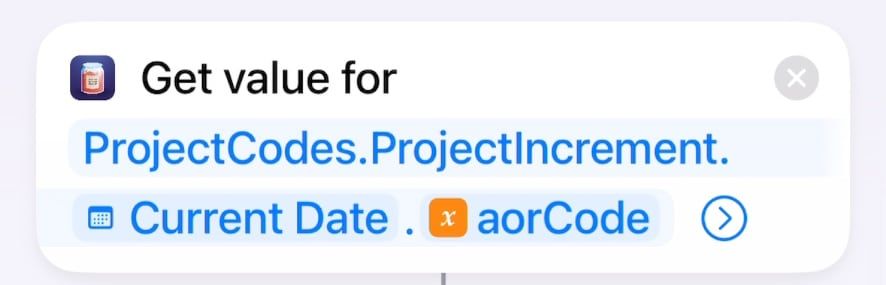 Get value for Get value for |
Step 5: Get value for the project. This digs into DataJar to find the increment in the year/code dictionary. The “current date” and variable in this step resolves to 2023.VH for my Vehicle code. |
| 6 | 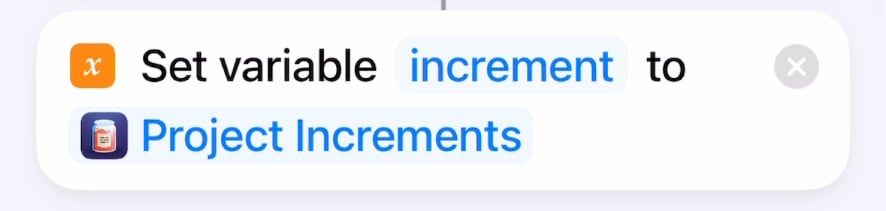 Set variable Set variable |
Step 6: Set variable increment to the number we pulled in Step 5 |
| 7 |  Get value for Get value for |
Step 7: Get value for another DataJar value that is the “icon” for the project. I keep these as emoji in the database. Totally optional, but I like emoji! |
| 8 |  Set variable Set variable |
Step 8: Set variable icon to the emoji found in previous step. |
| 9 |  Calculate Calculate |
Step 9: Calculate the project number by adding 1 to the previous project number found in Step 5 |
| 10 | 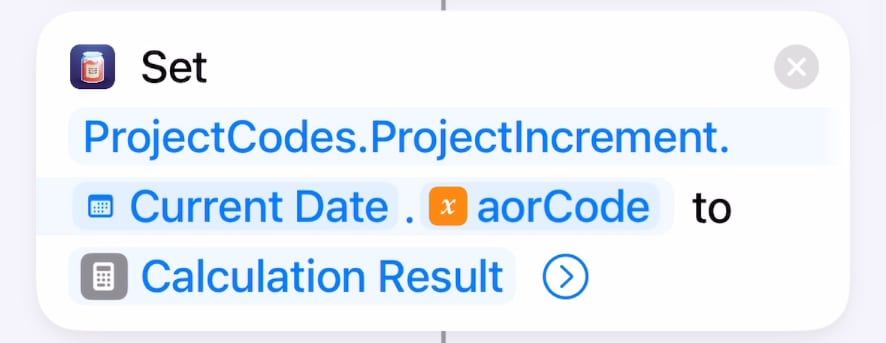 Set value Set value |
Step 10: Set value of the project increment to this new number. |
| 11 |  If If |
Step 11: If the increment is less than 10, we’re going to format the number with a leading zero to keep them all 2 digits. This keeps things properly sorted in the file system. |
| 12 | 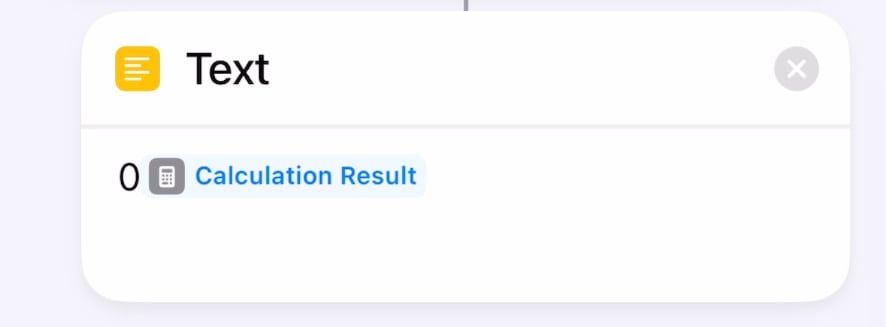 Text Text |
Step 12: Text with a zero and the single digit increment. This is a total cheap and messy hack, but I’m not embarrassed. Come at me (ง’̀-’́)ง. |
| 13 |  Otherwise Otherwise |
Step 13: If the incremnt is NOT less than 10, do this other thing. |
| 14 |  Text Text |
Step 14: Text of the increment from Step 9. |
| 15 |  End If End If |
Step 15: Closes out the If statement. |
| 16 | 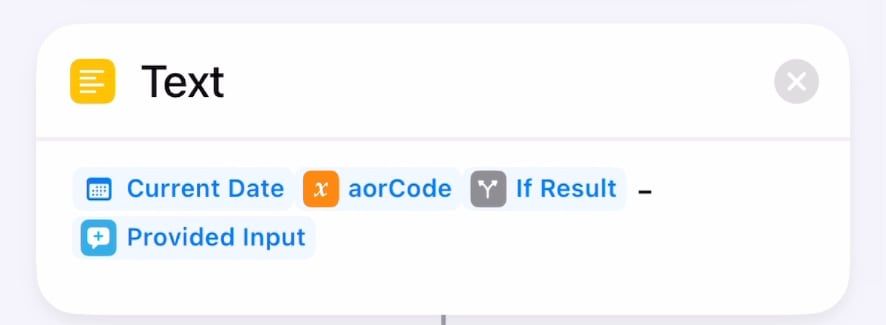 Text Text |
Step 16: Text that builds the project name. These variables will resolve to something like: 23HO14 - Paint the Patio if this was the 14th project in my Home domain in 2023. |
| 17 | 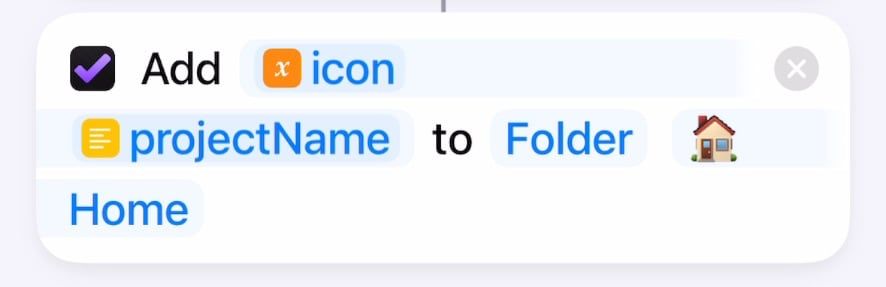 Add Omnifocus item Add Omnifocus item |
Step 17: Add Omnifocus Item with the icon variable (Step 8) and the project name (Step 16) to my 🏠 Home folder. |
| 18 | 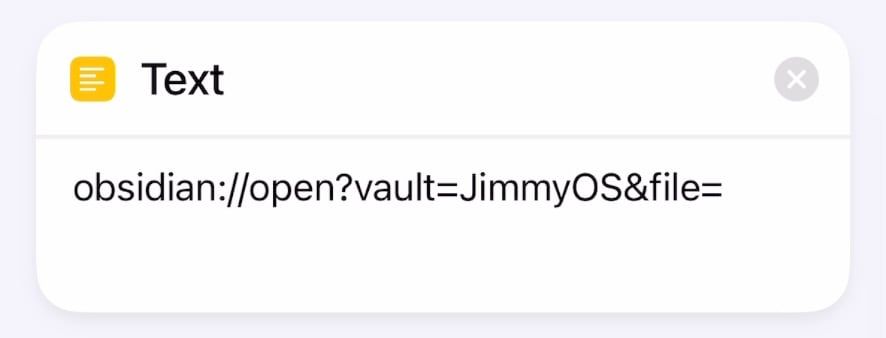 Text Text |
Step 18: Text with the base URL scheme for my Obsidian vault. |
| 19 | 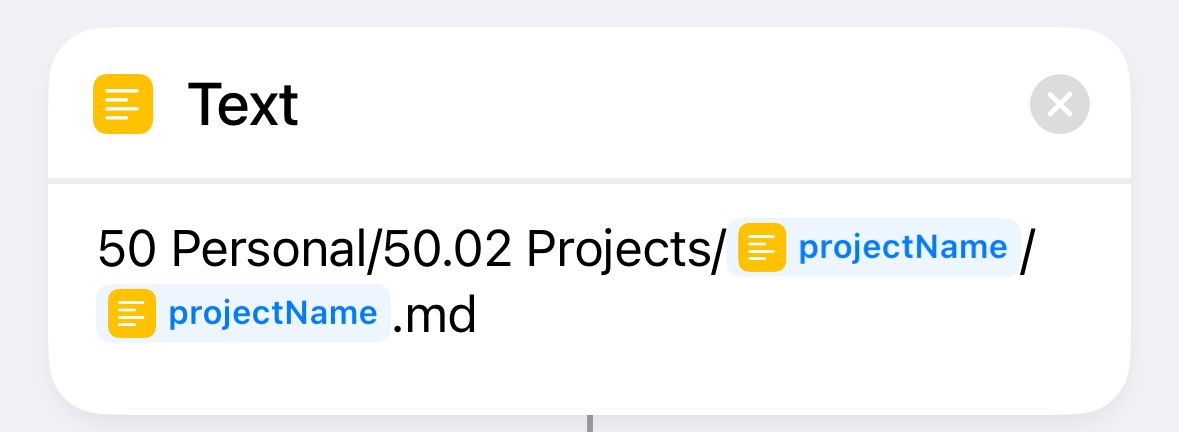 Text Text |
Step 19: Text with the folder path within my Obsidian vault, including the project name twice - once for the folder and once for the filename. |
| 20 |  Encode Encode |
Step 20: URL Encode the folder path. This is the reason it’s 2 different text blocks. The base URL is not encoded, the folder path is. |
| 21 |  Find Omnifocus projects Find Omnifocus projects |
Step 21: Find Projects where the title contains the project name. 1 |
| 22 | 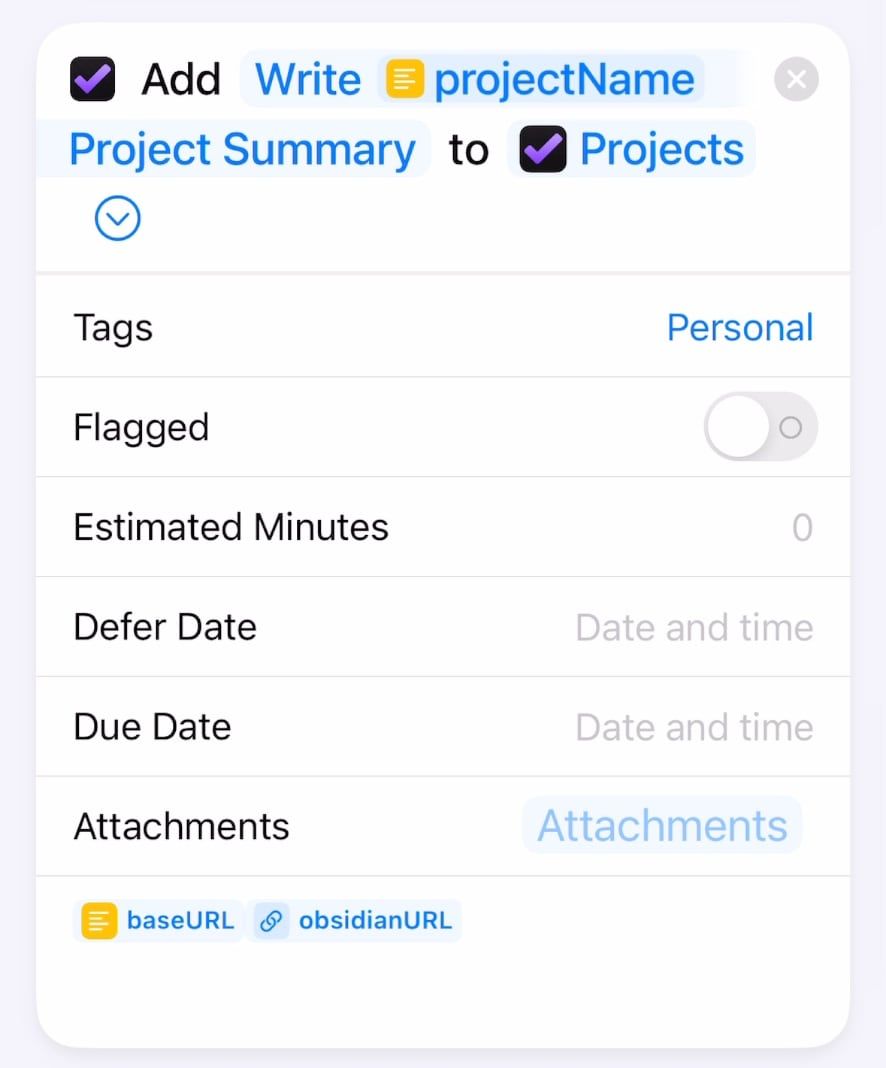 Add Omnifocus item Add Omnifocus item |
Step 22: Add Omnifocus item to create a task for filling out the project summary. The Note of the task has a URL built from the text in Steps 19 and 20. This will link to the document we’ll create next. |
| 23 | 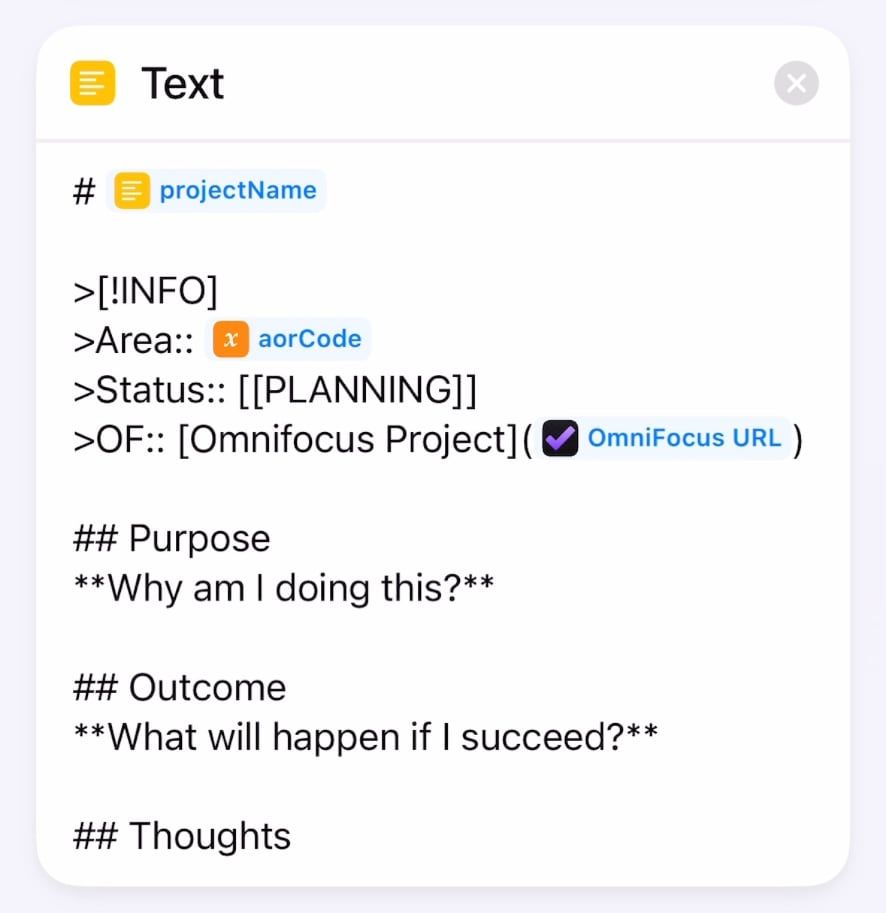 Text Text |
Step 23: Text with the template text for an Obsidian document that I fill out for every project. It includes variables for the project name, the code, and a link to the Omnifocus task created in Step 22. |
| 24 |  Set name Set name |
Step 24: Set name of the text in Step 23 to <<theprojectname>>.md. Be sure to toggle on “Don’t include file extension” option in the dropdown. If you don’t, Shortcuts will automatically add a txt extension. |
| 25 |  Create folder Create folder |
Step 25: Create folder in my Obsidian vault’s 50.02 Projects folder, which is where all my projects live. Folder will be named with the projectName variable. |
| 26 | 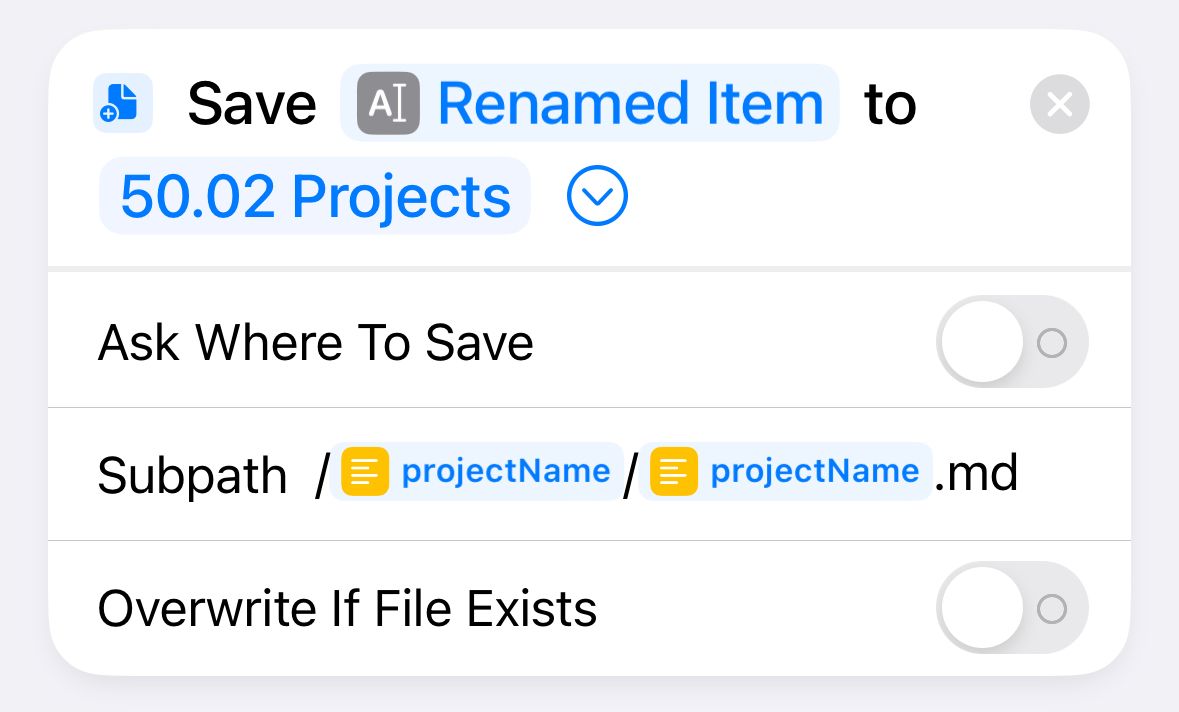 Save Save |
Step 26: Save the item renamed in Step 24 to the folder we created in Step 25, again using the project name variable for the folder path and file name. |
It’s a big one, for sure. But now with one tap, I can create a new project in Omnifocus and a folder and document in Obsidian that all link to each other, and I know it’s a unique name that’s easy to search and sort.
Creating the Obsidian “summary” document as part of the Shortcut also forces me to consider the project carefully as well. If I don’t fill in the summary doc within a few days, I delete the project. If I can’t justify in writing why I want to spend time on this thing, it’s probably not be worth doing.
Comment or reply on Mastodon
This is a big benefit of using project codes. Search is much easier because they are unique.↩︎