 |||
|||
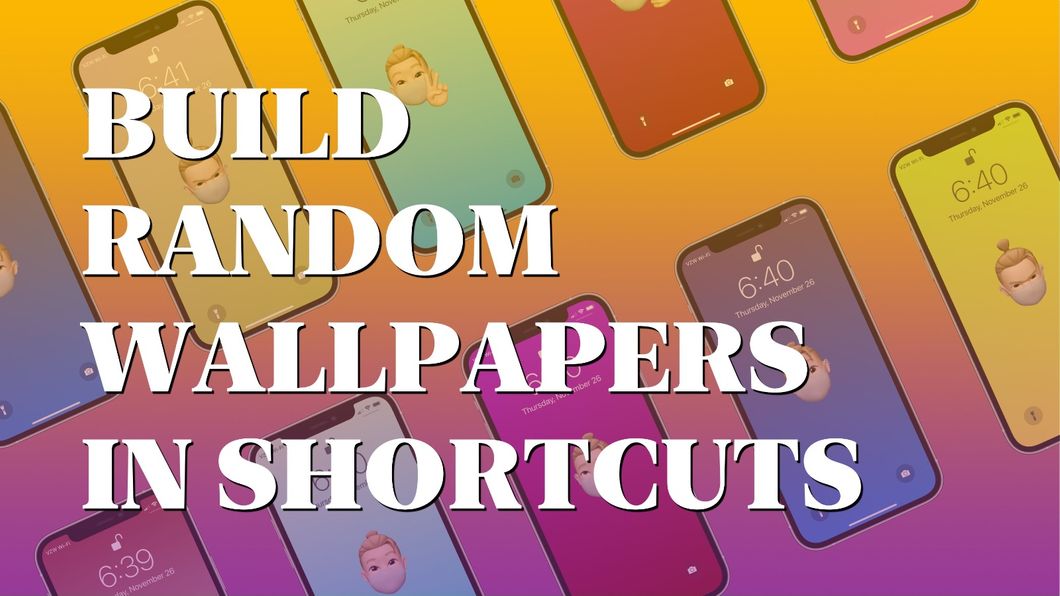
One of the new/not so new features in iOS 14 is the ability to set wallpapers using Shortcuts. This is great if you want to schedule a different wallpaper for weekends vs. during the week, or if you just like a change of scenery. But programming a ton of automated Shortcuts pointing to specific images in your Photo roll is a pain. Enter the Rando Wallpaper Generator!
First of all, credit goes to Frederico Viticci for creating the best part of this shortcut, the WallCreator Gradient Generator. I’ve pulled out the best parts of that Shortcut and modified it to work with my Rando Wallpaper Shortcut. The shorter “subroutine” version is required for Rando Wallpaper to work, and you can download the edited WallCreator - Random Auto now1. The Shortcut will also check to see if it’s installed if you forget.
This Shortcut creates a random gradient image for your device (iPhone or iPad), then places an overlaid image on top. In my case, I exported a bunch of my Memoji expressions to PNGs to use as the overlay. You can use any images you like.
To set this up, you’ll need to install both the editied WallCreator Shortcut and the Rando Wallpaper Shortcut. Then, you’ll need a folder in your /Shortcuts folder on iCloud Drive to hold all the images you want overlaid on the gradient. Some things to keep in mind:
OK, now to the good part…
| Step | Image | Description |
|---|---|---|
| 1 | 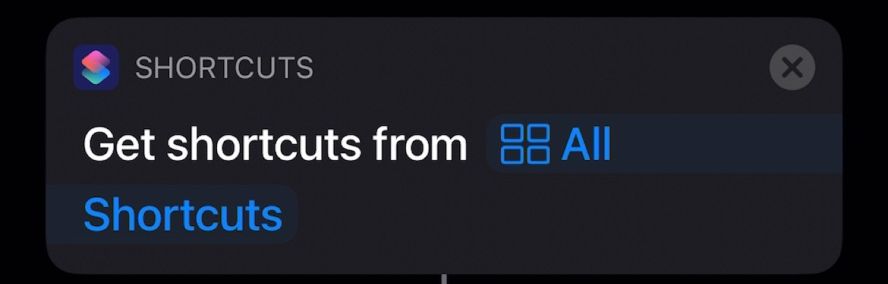 Get Shortcuts Get Shortcuts |
Step 1: This gets a list of all installed Shortcuts as a text list |
| 2 | 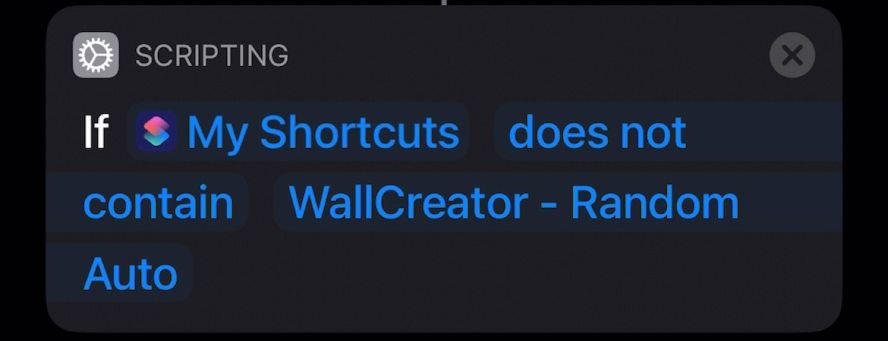 If If |
Step 2: Checks for the text “WallCreator - Random Auto”. If it’s not there… |
| 3 |  Show Alert Show Alert |
Step 3: An alert will pop up telling you to download the gradient builder shortcut. |
| 4 | 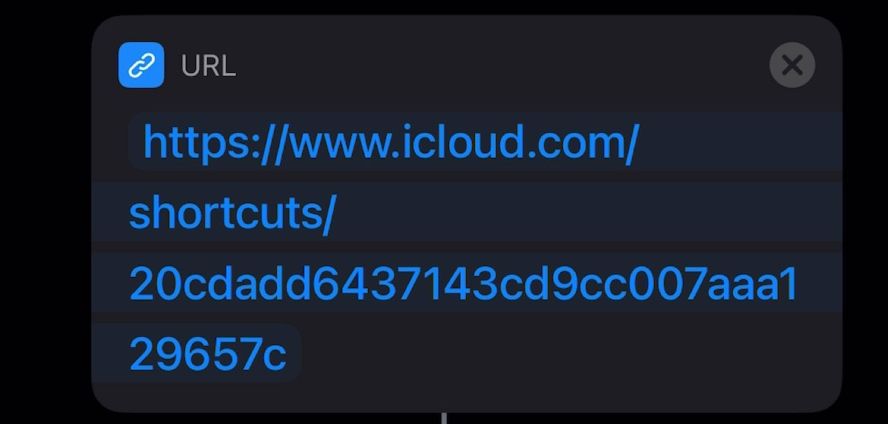 URL URL |
Step 4: This is the URL to the WallCreator - Random Auto Shortcut |
| 5 | 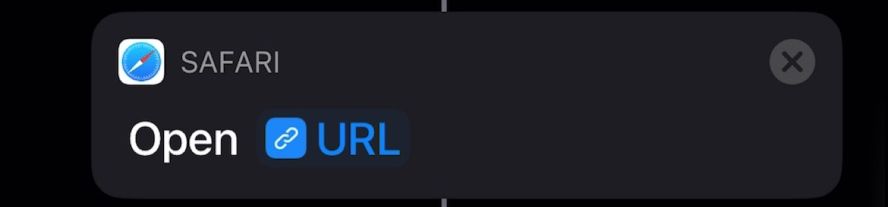 Open URL Open URL |
Step 5: this will redirect to add the Shortcut in the Shortcuts app |
| 6 | 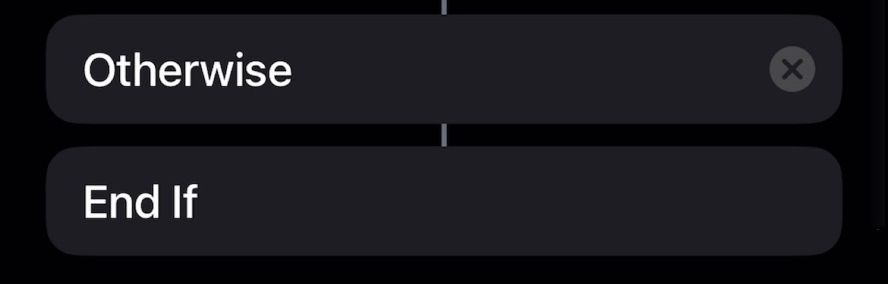 Otherwise / End If Otherwise / End If |
Step 6: If the Wall Creator - Random Auto Shortcut is already installed, the IF loop will exit and move on. Note: You can delete all Steps 1-6 once this is up and running. It may save a second or two every time you run it. |
| 7 | 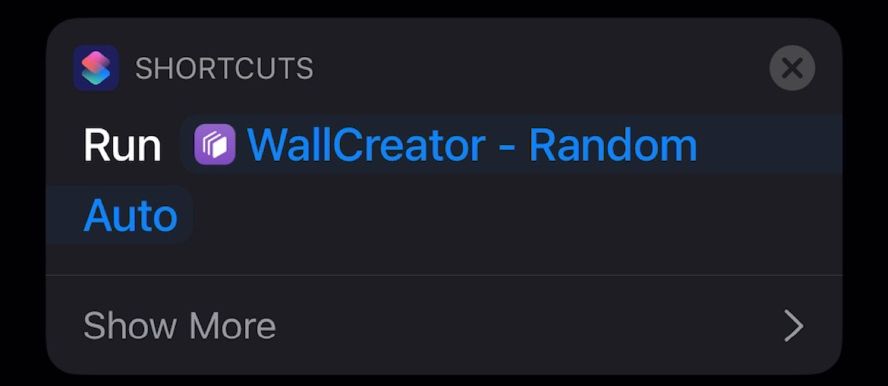 Run Shortcut Run Shortcut |
Step 7: Runs the gradient background generator Shortcut and sends the result back to this Shortcut as an image appropriate for the device you’re currently using. |
| 8 |  Get File Get File |
Step 8: Grabs all the overlay files from the iCloud Drive folder. Be sure to edit this step to point to your images folder! |
| 9 | 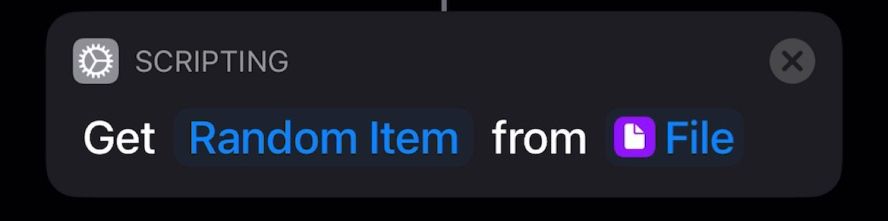 Get Random Item Get Random Item |
Step 9: Selects a random item from the list of files. |
| 10 | 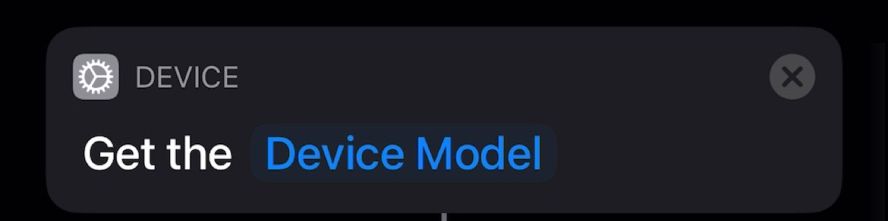 Get Device Info Get Device Info |
Step 10: This step gets the model of the device you’re currently using. We use this later to set the coordinates for the overlaid image. |
| 11 | 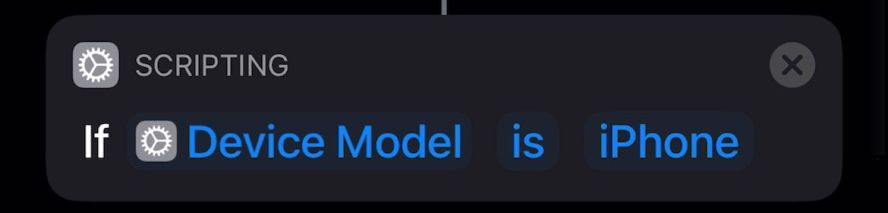 If If |
Step 11: If this is an iPhone, do the next thing… |
| 12 | 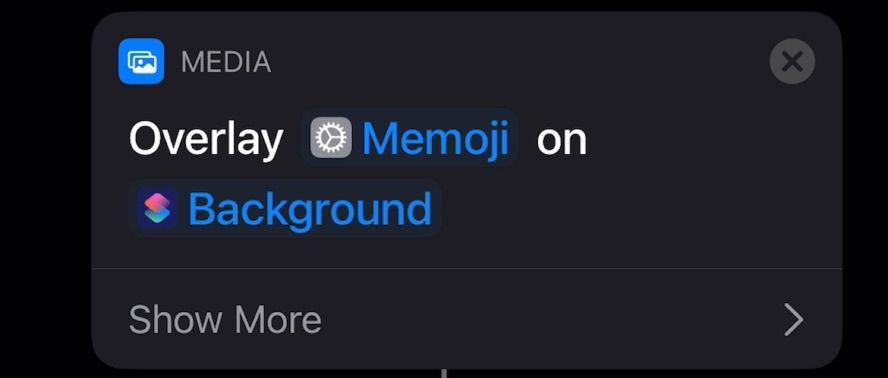 Overlay Overlay |
Step 12: Overlay the randomly selected Memoji on the gradient background. You will have to play with the coordinates to get the image overlaid where you like it. (Coordinates can be set in the “Show More” section) |
| 13 | 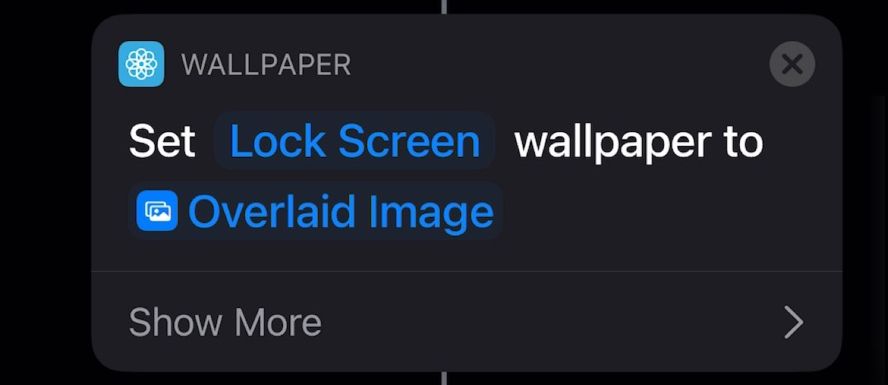 Set Wallpaper Set Wallpaper |
Step 13: Set the image that was just created as Wallpaper. I only change the Lock Screen, but you can set to Home Screen or Lock Screen or both. |
| 14 |  Otherwise Otherwise |
Step 14: If this device isn’t an iPhone (i.e., it’s an iPad), do the next thing… |
| 15 | 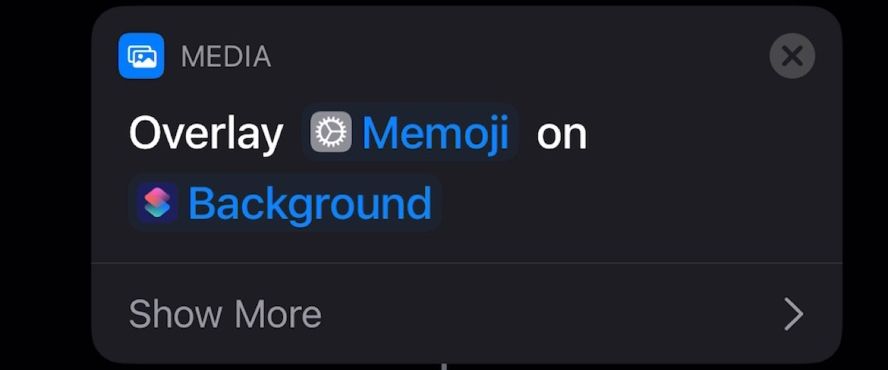 Overlay Overlay |
Step 15: Same as step 12, but has different coordinates set for iPad screen sizes. |
| 16 | 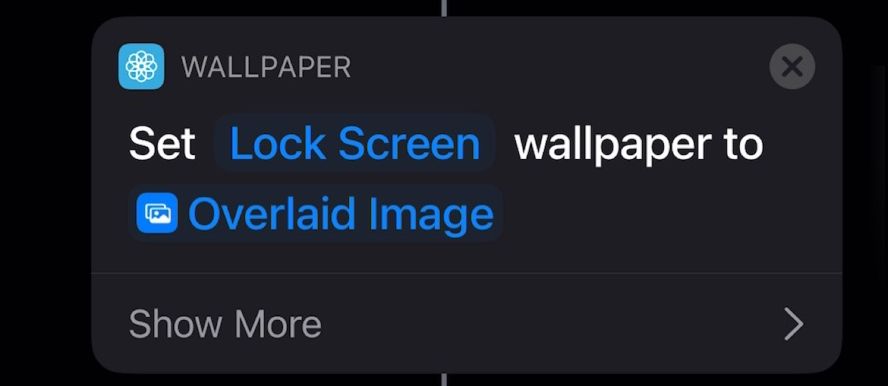 Set Wallpaper Set Wallpaper |
Step 16: Set this image as wallpaper. |
| 17 |  End If End If |
Step 17: Get out of the If Loop. |
| 18 | 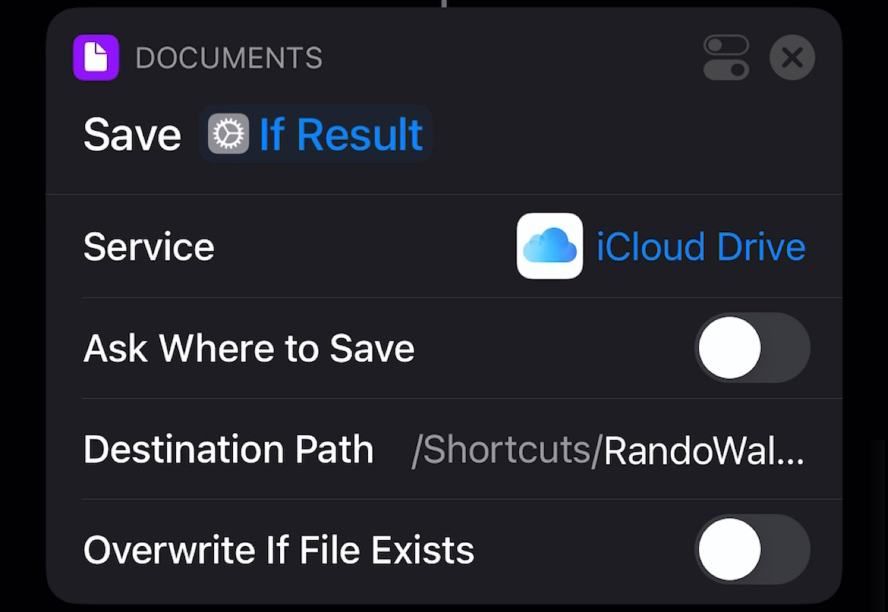 Save File Save File |
Step 18: I save them all to a folder so I can go through them later. Totally optional. |
I never run this Shortcut manually. I set a bunch of automation triggers: Whenever I connect to power, connect to CarPlay, or finish an Apple Watch workout, this runs and I get a new wallpaper. I’ve also added it as a Run Shortcut action to a few Shortcuts I use daily for work, so I always have a fresh Lock Screen.
Have fun with it! You can get the Shortcut here
If I could copy/paste multiple actions, I’d just embed these actions into my Shortcut, but ain’t nobody got time for dragging single actions around!↩︎