 |||
|||
There are lots of tools in the world that can manage your windows on the Mac. There is Moom, Better Touch Tool, Better Snap Tool1, Mosaic, Magnet, Veeer, and probably 40 others. If you’re a Keyboard Maestro user, maybe you don’t need any other tools.
Keyboard Maestro can do eleventy-billion things. I use it for a bunch of stuff like text replacement, UI scripting, keyboard shortcut overrides, adding keyboard shortcuts to apps that don’t have them, running scripts, performing API calls, and more. For this post, the “more” is window management. We’ll get to the nitty-gritty in a bit, but first, let’s talk basics…
Any of the tools mentioned above, and many more, can do this with less finicky pre-programming. Once everything is set up, it works just as well (better, in my opinion) in Keyboard Maestro as it does with any other dedicated app. There is no UI, so you don’t see a Moom-like grid, and there’s no drag-to-the-edge action, but I run all this from my keyboard, so none of that interests me.
All of these window positions are individual Keyboard Maestro macros. They are triggered via one of two keyboard shortcuts, called a “hotkey trigger” in Keyboard Maestro. One is my “spatial” shortcut, which is a combination of some modifiers and the number pad. I use this one 99% of the time. I have a second hotkey trigger that triggers a conflict palette. This is used when I’m on my laptop and don’t have the number pad. I also have them mapped to a Stream Deck profile that has buttons for each position as well.
Here’s what it looks like in action: 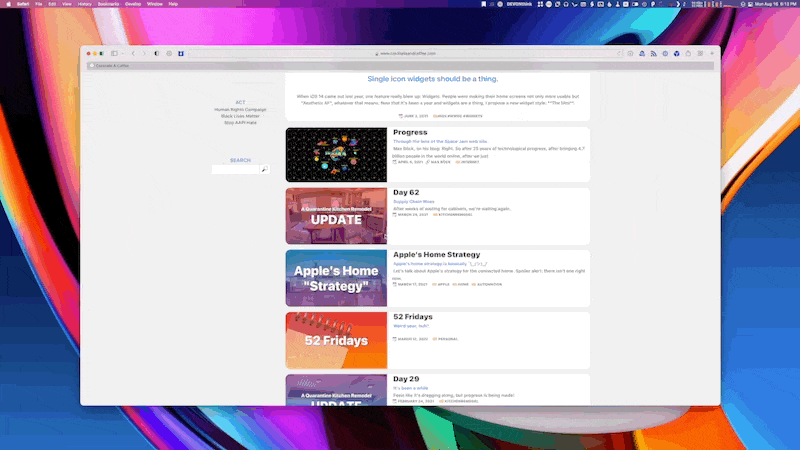
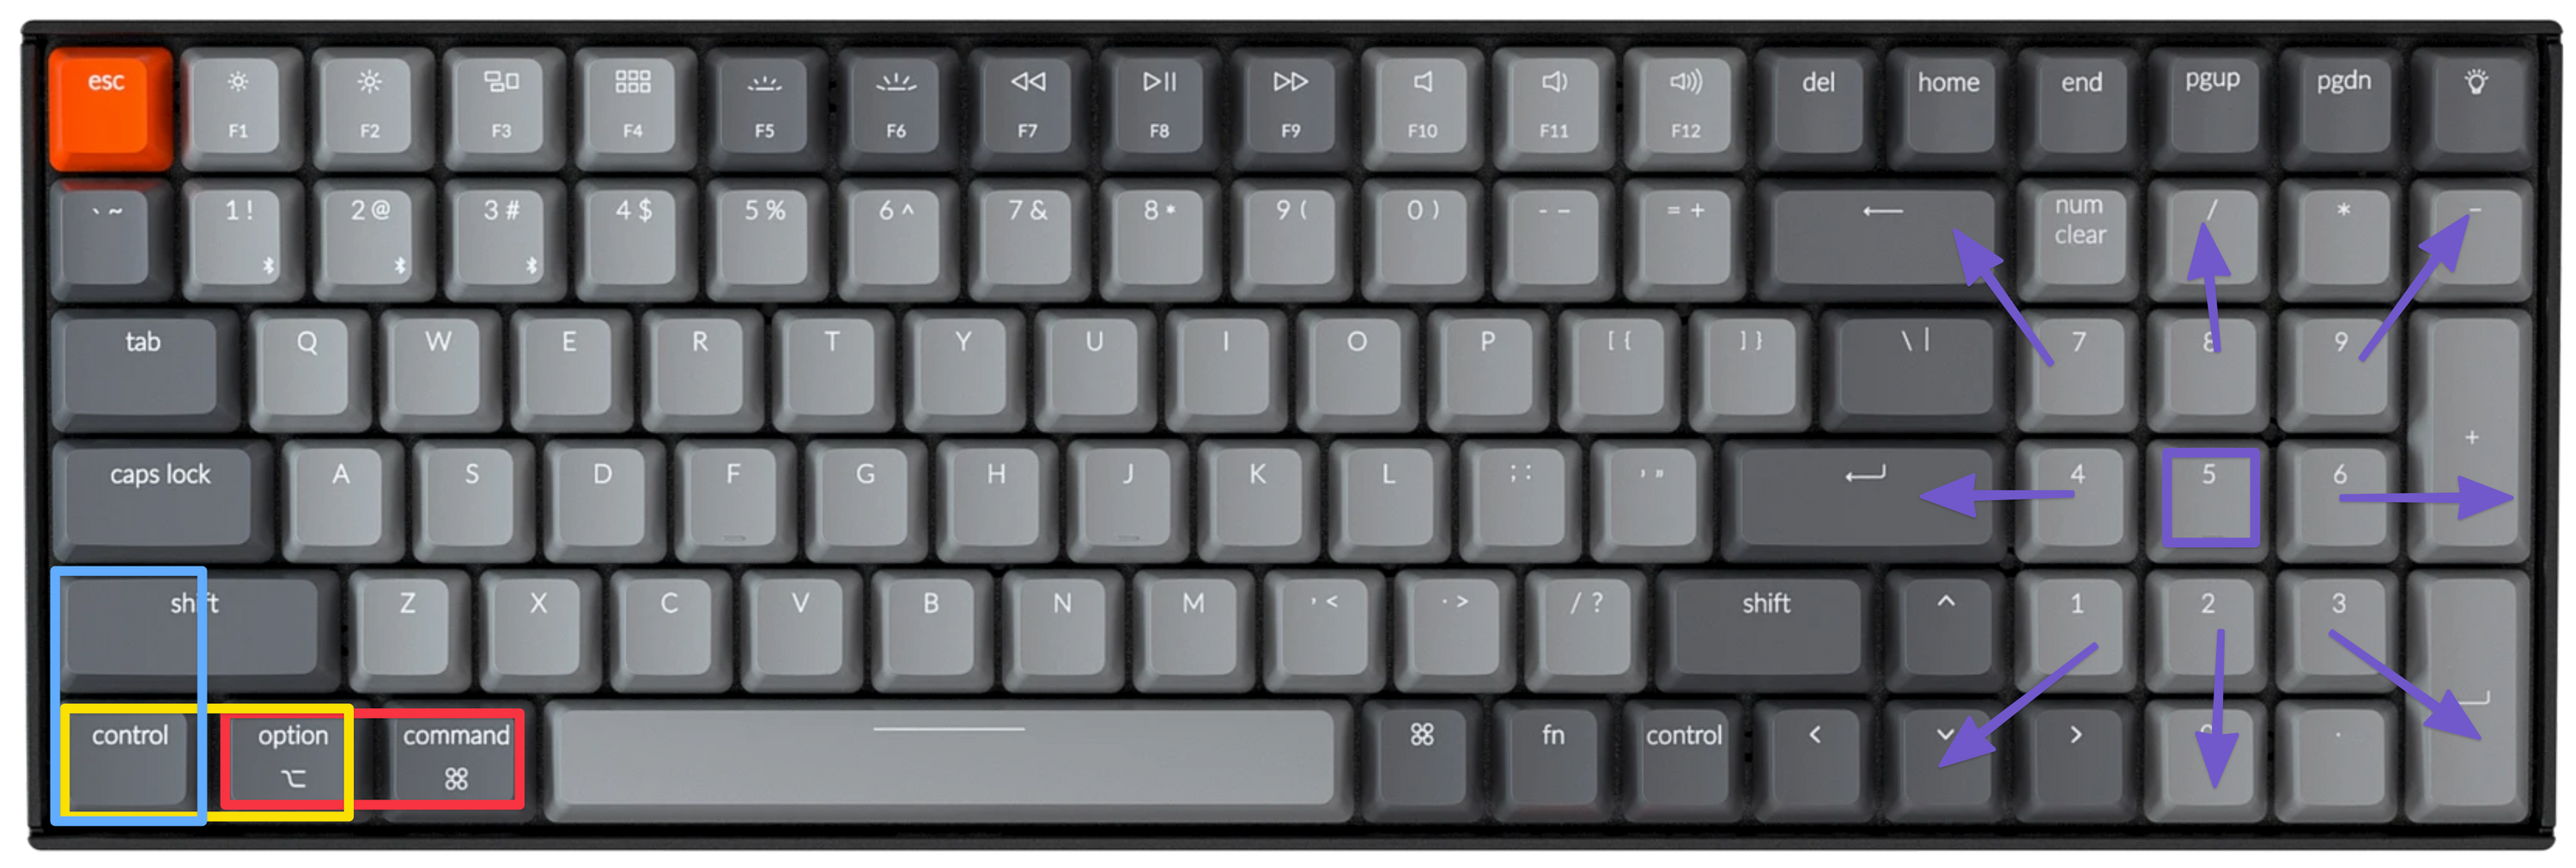
The spatial setup makes sense to me. I hold down 2 modifiers and then hit a key on the number pad. The number pad is the “map” of the screen. Here’s how it breaks down
1 Bottom left
2 Bottom middle
3 Bottom right
4 Left half
5 Center focus
6 Right half
7 Top left
8 Top middle
9 Top right
The modifiers are a bit more nuanced but still make sense.
⌥⌘ (Option-Command) is the right monitor
⌃⌥ (Control-Option) is the left monitor (when it’s in landscape)
⇧⌃ (Shift-Control) is the left monitor (when it’s in portrait)2
It seems confusing, but if you wrap your head around “the right two keys are the right monitor, the left two keys are the left monitor, and the number pad is a map” it totally makes sense (to me.) These modifier combinations also work with the Stream Deck buttons to target the left or right monitor. In this image (I use a Keychron K4 as my main keyboard, FWIW), the red box is the right monitor, the yellow box is left monitor in landscape, and the blue box is the left monitor in portrait. The purple arrows are where the macro throws the window.
 The Keyboard
In addition to the Stream Deck and the spatial triggers, I set another hotkey trigger (⌃⌥⇧⌘-Up Arrow) on ALL the shortcuts. If multiple shortcuts have the same trigger, Keyboard Maestro throws up a Conflict Palette, which lets you choose an option by typing a letter or two. This is the way I trigger everything on my laptop when I don’t have my big keyboard. Here’s what that looks like:
 GIF of the Keyboard Maestro Conflict Palette
Now the fun part. First, if you’d like to play along, you can download my Macro Set as a starting point. They are built for side-by-side 28” 4K monitors with the main monitor on the right, so you may need to adjust to your setup.
Here’s one of the macros we can walk through… 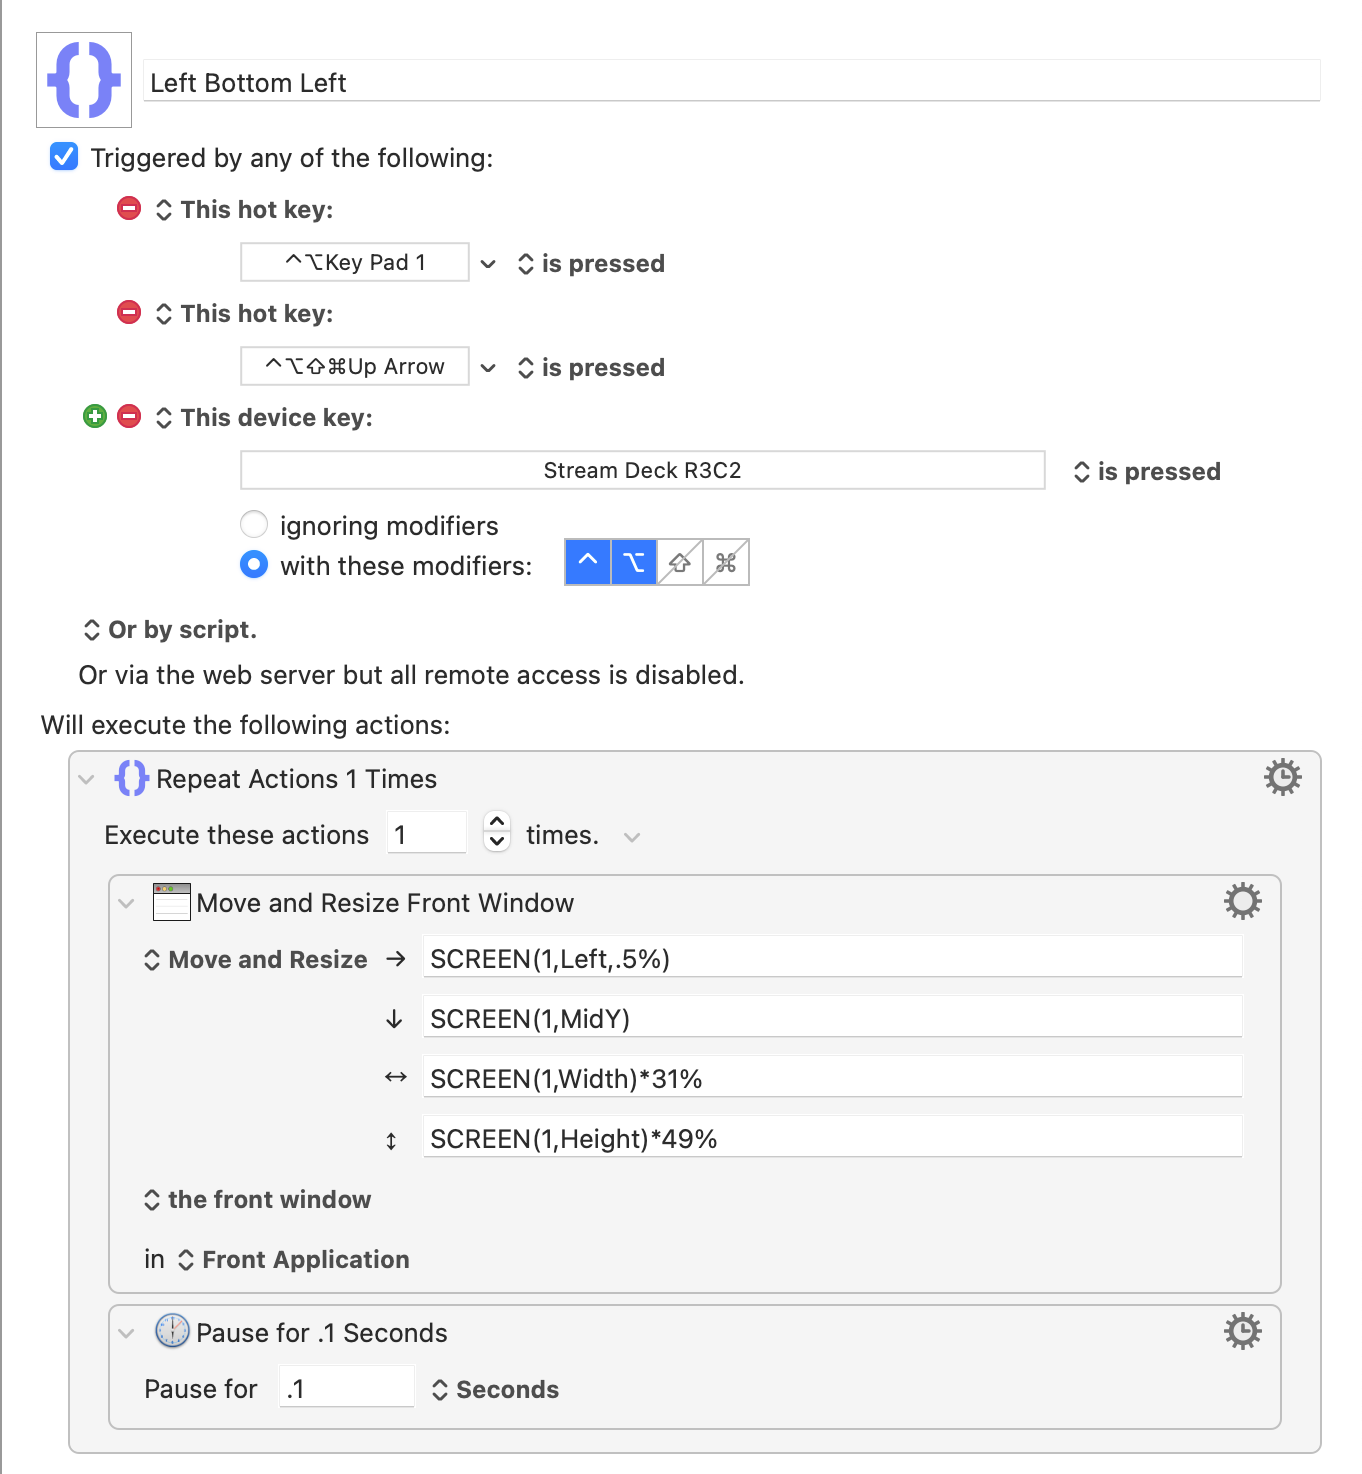
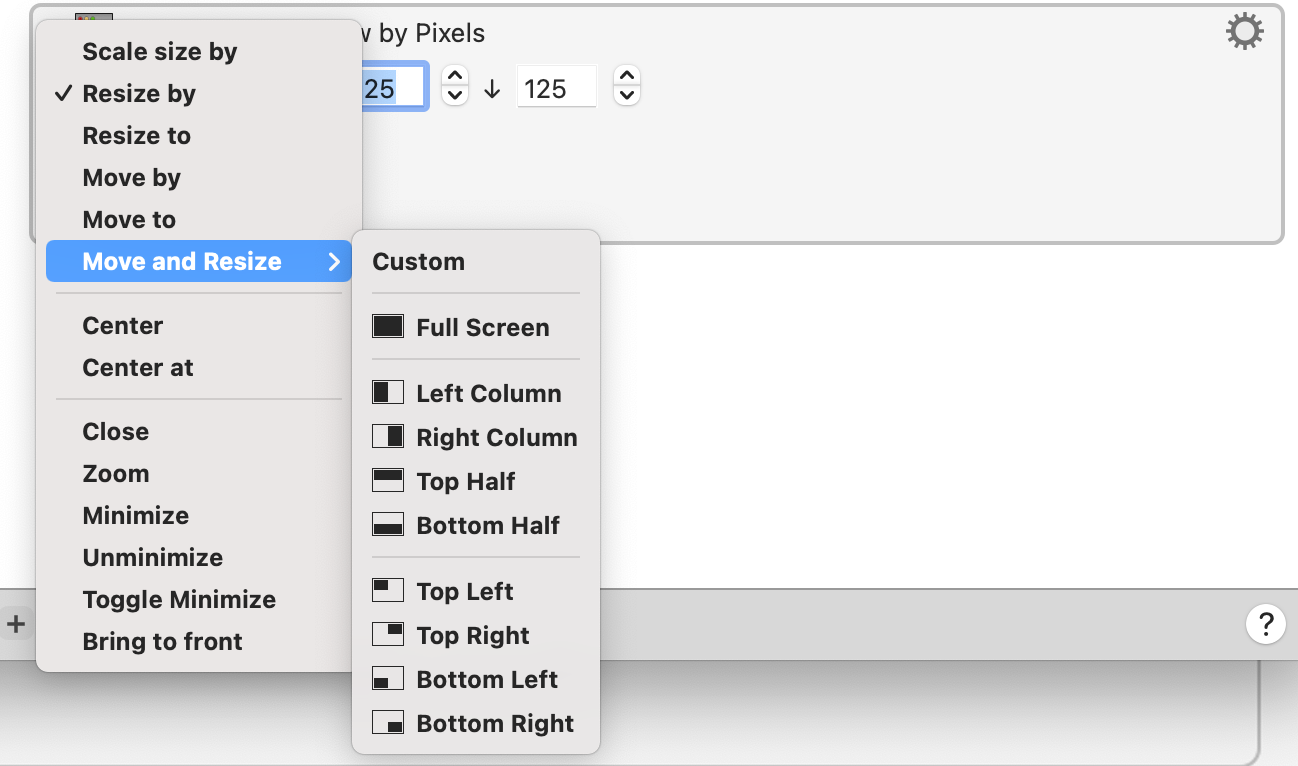 To get to a
 Move and Resize action in Keyboard Maestro, you need to first drag in a Resize a Window action, then change to Move and Resize in the dropdown. If you have simple needs, Keyboard Maestro provides some good presets, and you don’t have to do all the math. Just pick a half or quadrant, and you’re good to go. It’s also helpful to just choose one and see what KM throws in the values for position and size. This is how I learned what to do.
The presets are fine, but I have more complicated needs. I have big 4K monitors, so I prefer a grid of 6, not a grid of 4. I also prefer a little space between my tiled windows. This lets me peek between them and have just enough space to click on a background window if I need it.
In the above macro, the settings are for my Left monitor. For my setup, this is monitor 1 (even though my right monitor is set up in Display Preferences as my MAIN monitor). I have all these set up as percentages. This allows me to use them on my desk setup and my laptop. If you only have one setup, you could easily replace all the percentages with actual pixel dimensions.
Now, let’s explain the screenshotted3 macro above.
SCREEN(1,Left,.5%)
SCREEN(1,MidY)
SCREEN(1,Width)*31%
SCREEN(1,Height)*49
Put them together and you get a window that’s about half the height, 1/3 of the width, and placed 1/2% from the left edge and halfway down the monitor. That’s the bottom left window. Now, do that for all six positions.
One thing to keep in mind - there is SCREEN, which takes the entire screen as the base for the calculations. There is also SCREENVISIBLE, which I use on all of my right-screen macros. The SCREENVISIBLE command takes the “visible” screen as the base of the calculations, not including the menu bar or the dock. Technically, you could use SCREENVISIBLE for all of these macros, but I didn’t know about SCREENVISIBLE when I started this journey. Everything for my right monitor is for the visible area of screen 2. SCREENVISIBLE(2,etc,etc)
If you look in my Macro Group, there are a few other things I use all the time.
One is the “Get Window Position” macro, which does what it says on the tin. Click a window, run the macro, and you’ll get a pop-up with the pixel dimensions and position of the window. This can be helpful if you want a very specific setup.
The others are “Place this App” macros. I use these so I can set a window position for an app. I always want Slack in the bottom middle. I always want my Calendar in the bottom left. I set these up, and run them as part of a bigger “Reset Desktop” macro that shuffles all my windows back into a nice grid when things get out of hand.
Keyboard Maestro is super powerful and can be intimidating to new users. Take it easy. Don’t dive in with both feet. As with any automation system, start slow, and expand as you learn. There are less complicated ways to manage your windows, but if you want infinite customizability, cross-machine consistency, and as few tools running in the background as possible, this is a good choice.
You can download the Macro Set here